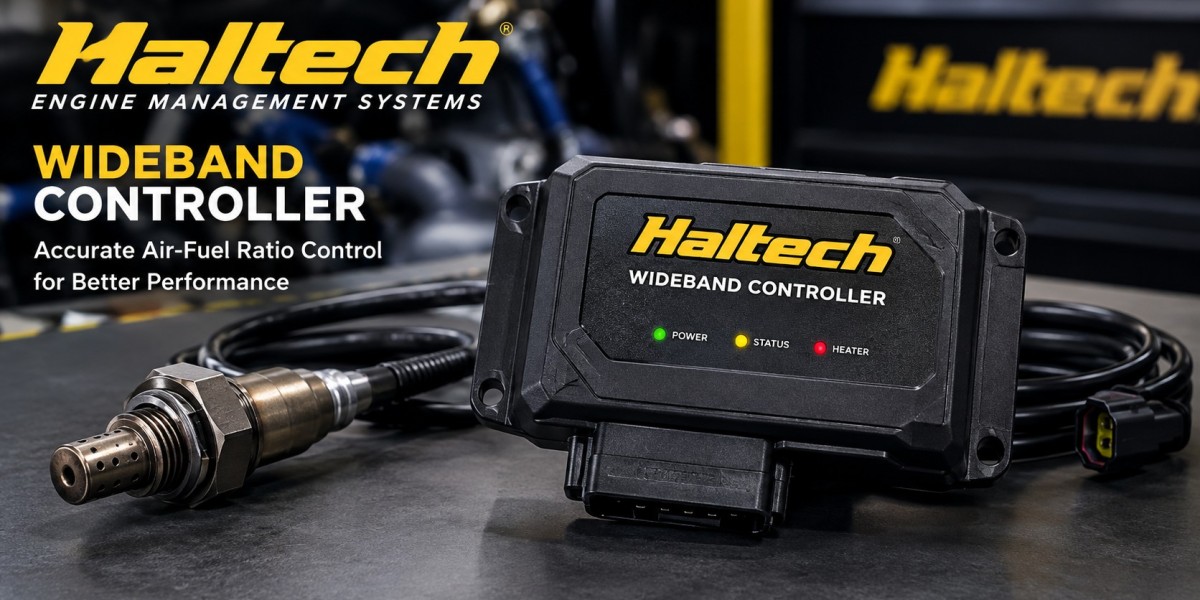

Buying engine management hardware should feel exciting, yet it often turns into a maze of part numbers, compatibility questions and conflicting forum advice. Wideband equipment is a good example. The category looks simple on the surface, but there are real differences in channel count, communication method, sensor quality and the support that comes with the product.This guide is written for the person who is about to search for a Haltech wideband controller for sale and wants to make a confident decision. It explains what a complete Haltech wideband controller kit should include, how to match it to your ECU and engine, how to plan the installation and how to avoid the most common mistakes. By the end you should know exactly what to order and what else you will need to finish the job.
Why an AFR Measurement System Is Worth the Investment
An AFR measurement system is the closest thing a tuner has to a window into the combustion process. Without it, you are inferring mixture quality from indirect signs such as spark plug colour, exhaust smell or power on the dyno. Those clues are useful but slow, and they cannot warn you about a lean spike lasting a fraction of a second.
With a wideband system, every second of driving becomes data. You can see how the engine behaves while cold, under steady cruise, during tipping, across the boost curve and at the rev limiter. Because the data arrives continuously, you can fix faults while the evidence is fresh rather than after something breaks.From a financial perspective the logic is simple. A wideband kit costs a small fraction of a rebuilt engine, and it gives you the means to protect that engine every time it runs. For anyone modifying injectors, turbochargers, camshafts or fuel type, it is among the most cost effective items on the build list.
What a Haltech Wideband Kit Should Include
Not every listing is identical, so compare contents carefully. A wellspecified Haltech wideband kit generally includes the following
Controller module with the electronics that drive and read the sensor.
Wideband sensor, typically a Bosch LSU 4.9 type, supplied new.
Wiring harness with the correct connectors for the module and sensor.
Mounting accessories, such as a welding bung and a blanking plug for the bung if you ever remove the sensor.
Instructions covering wiring, CAN setup and calibration.
If an advertised price looks low, check what has been left out. A controller sold without a sensor or harness may be perfectly legitimate, but the real cost will be higher once you add the missing parts. Equally, a bundle that includes items you do not need, such as a gauge when you intend to use the ECU's display, may not be good value.
Single Channel or Dual Channel?
The first choice is the number of sensors you plan to run. A single channel unit handles one sensor and is the right answer for most fourcylinder, inlinesix and singleexhaust installations. A dualchannel unit drives two sensors and is a better match for V6, V8 and flat engines, and for any build with two separate exhaust banks or twin turbochargers.
With two sensors you can see each bank independently. That matters because banks rarely behave identically. Differences in intake runner length, exhaust flow or injector tolerances can leave one side richer than the other. A single sensor shows only an average, which can hide a problem on one bank.If you are undecided, consider future plans. Buying a dual channel controller for a car that may later get a second turbo can save money compared with purchasing a second singlechannel unit down the line.
Compatibility With Your ECU
The most important compatibility question is how the controller will connect. A Haltech ECU wideband controller designed for CAN communication works naturally with Haltech Elite and Nexus ECUs, because the ECU already recognises the controller in its CAN device list. That makes setup quick and gives you digital data in your logs.
If you use a nonHaltech ECU, or an older unit, check whether it accepts the CAN messages or whether you must use the analogue output. Analogue works perfectly well for logging and display, but you should confirm the voltage range and how to scale it in the receiving device. Always read the manual for both products before ordering.It also pays to confirm software requirements. Some features, such as closed loop trim and device selection, may require a current version of the tuning software. Update the software and the ECU firmware before you start, so you are not troubleshooting version mismatches during installation.
Price, Authenticity and Where to Buy
Prices for wideband equipment vary by country, retailer and stock level, and exact figures change often, so use any price you read online as a guide only. Compare the total cost, including shipping, taxes, sensor and harness, and consider warranty terms.
Authenticity matters more than people expect. The market includes imitations of popular modules and sensors, and a poor copy can be inaccurate, unreliable or even hazardous to your engine. Buy from an authorised retailer, check the packaging and serial markings and keep the invoice. If a deal looks too good to be true, it probably is.Support is the other factor. A retailer that can answer a wiring question before and after the sale is worth a slightly higher price. When you are building a full harness around the new controller, a supplier that also stocks motorsport connectors makes it easier to complete the whole job in one order. For example, the ASDD41WAYPLGPINAKEYYELLOW is a sealed 41way plug used in custom engine harnesses.
RealTime AFR Readings What You Gain
Realtime AFR readings change the way you tune and the way you drive. Instead of waiting for a dyno session to find out how the car behaves, you can check the mixture on the road or track and make small refinements between sessions.
On a street car that means smoother partthrottle behaviour, cleaner cold starts and improved economy because the cruise areas of the map can be tuned precisely. On a performance car it means safe boost fueling and a clear record of every pull. On a competition car it means the ability to review a whole race and see precisely when something started to drift.A useful technique is to create a dashboard page that shows lambda, target lambda, boost pressure and knock level side by side. Seeing those four channels together makes it obvious whether a lean excursion was due to fueling, boost control or ignition.
Planning the Installation Before the Parts Arrive
A little planning turns installation from a weekend of frustration into a smooth job. Before the box arrives, decide on these items
Sensor location. Mark the exhaust position, checking clearance for the sensor body and cable.
Controller location. Choose a cool, dry mounting point near the ECU, away from heat and water spray.
Cable routes. Plan the path for power, ground, CAN and sensor cable before cutting any wire to length.
Power source. Identify a fused, switched supply that can handle the heater current.
Ground point. Pick a clean ground location and prepare the surface.
Connectors and tools. Gather crimp tools, heat shrink, loom and any connectors you need.
For longer runs, such as a sensor mounted in a rear exhaust section and a controller in the cabin, think about cable length. Do not extend the sensor cable unless the manufacturer allows it. It is generally better to move the controller closer to the sensor and extend the power and CAN wires, which are far less sensitive.
Wiring and Setup Overview
The Haltech wideband controller wiring is straightforward when approached in order. Connect the power feed with an inline fuse, connect the ground to a verified clean point, connect the CAN high and CAN low pair to the ECU bus, and finally connect the sensor. Check every connection with a meter before power is applied.Software setup then follows. In Haltech NSP you add the controller to the CAN device list, set the correct address, and map the lambda channel. This stage is where a proper Haltech lambda sensor setup is confirmed, with the engine off showing the expected fresh air reading and the engine running showing a stable idle value. If you intend to use closed loop control, set conservative limits at first and widen them only once you have verified the base tune.Builders who prefer a modular harness often divide the wiring into sections. A compact 9way plug, such as the ASDD9WAYPLGSKTNKEYRED, is ideal for a subharness serving a wideband controller and a few related sensors, since it can be unplugged quickly for service.
Tuning With the New System
Once the system is installed and verified, begin with a safe baseline. Confirm that the base fuel map is reasonable and that ignition timing is conservative, then warm the engine fully and watch the idle mixture. Next, do light cruise tests and make small corrections. Only then should you increase load.
A typical engine tuning controller workflow looks like this
Verify injector data and fuel pressure.
Tune idle and lowload areas toward your lambda targets.
Tune partthrottle cruise for economy and smoothness.
Tune transient fueling for clean typing.
Finally, tune fullload fueling on a dyno or in a safe, controlled environment.
Targets depend on the engine. Many tuners aim for lambda near 1.00 at cruise, slightly richer than stoichiometric during acceleration, and around 0.85 to 0.90 at full load on a naturally aspirated engine, with richer figures often used under boost. Treat these as starting points and rely on a qualified tuner when pushing limits.
Accessories and Spares Worth Buying
A few additional items can save time later. A spare sensor is the most useful, because sensors are consumables and a failure on race day can end an event. A blanking plug lets you remove the sensor without leaving an exhaust leak. Spare connector pins, seals and a quality crimp tool make field repairs possible.If you plan a larger electrical project in the same car, such as a full motorsport harness, it is efficient to specify connectors at the beginning. A part like the ASDD23WAYPLGPINAKEYYELLOW gives a midsize sealed interface that suits many engine bay layouts, and choosing matching keys across the harness prevents accidental crossconnection.
Common Buying Mistakes
The following mistakes appear again and again
Buying without checking ECU compatibility. Confirm CAN support or analogue requirements first.
Choosing a single channel for a twinbank engine. You will want the second sensor sooner than you think.
Ignoring harness length. A short harness forces compromises in mounting.
Overlooking the sensor. A bargain controller with a cheap sensor will give poor readings.
Skipping documentation. Make sure instructions or a manual are available.
Not budgeting for connectors and wire. Good wiring is part of the system.
Avoiding these errors usually matters more than finding the lowest price. A correct, complete kit installed well will outperform a cheaper, poorly planned setup every time.
Conclusion
Choosing a Haltech wideband controller kit comes down to a few clear decisions: how many sensors you need, how the controller will talk to your ECU, what the kit includes and where you buy it. Make those decisions deliberately, plan the installation before the parts arrive and follow a careful setup and calibration routine. The result is a measurement system that you can trust, and a tune you can verify.When it is time to build the supporting harness, explore the Deutsch Autosport ASDD connector range or visit Arctic Performance Parts for sealed motorsport connectors that match the quality of your new wideband system.
Frequently Asked Questions
What should I look for when buying a Haltech wideband controller?
Check the channel count, communication method, sensor type, harness length and whether the kit includes a bung and documentation. Confirm compatibility with your ECU and buy from an authorised retailer.
Is a wideband kit hard to install?
Not for someone comfortable with basic automotive wiring. The main tasks are welding a bung, running power, ground and CAN wires, and configuring the software. If you are unsure about welding or tuning, ask a professional.
Do I need a wideband controller if I already have a wideband gauge?
A gauge usually includes its own controller. However, if it cannot send data to the ECU over CAN, you may still want a CANcapable controller for logging and closed loop control.
How many sensors do I need?
One sensor per exhaust bank is the best practice. Single exhaust inline engines can use one, while V engines and twinturbo setups benefit from two.
Can I reuse the sensor from an old controller?
Possibly, if it is the same type and still in good condition, but it is usually better to fit a new sensor with a new controller so that calibration is based on a healthy element.